As soon as material is placed in racks, ipolog 4 Workspace automatically optimizes the container arrangement within the racks. To edit this arrangement, select the rack planogram:
When you select the module, the view is initially empty. Select the desired shelf or material area by clicking on it in the layout or in the 3D view and it will appear in the rack planogram window.
Overview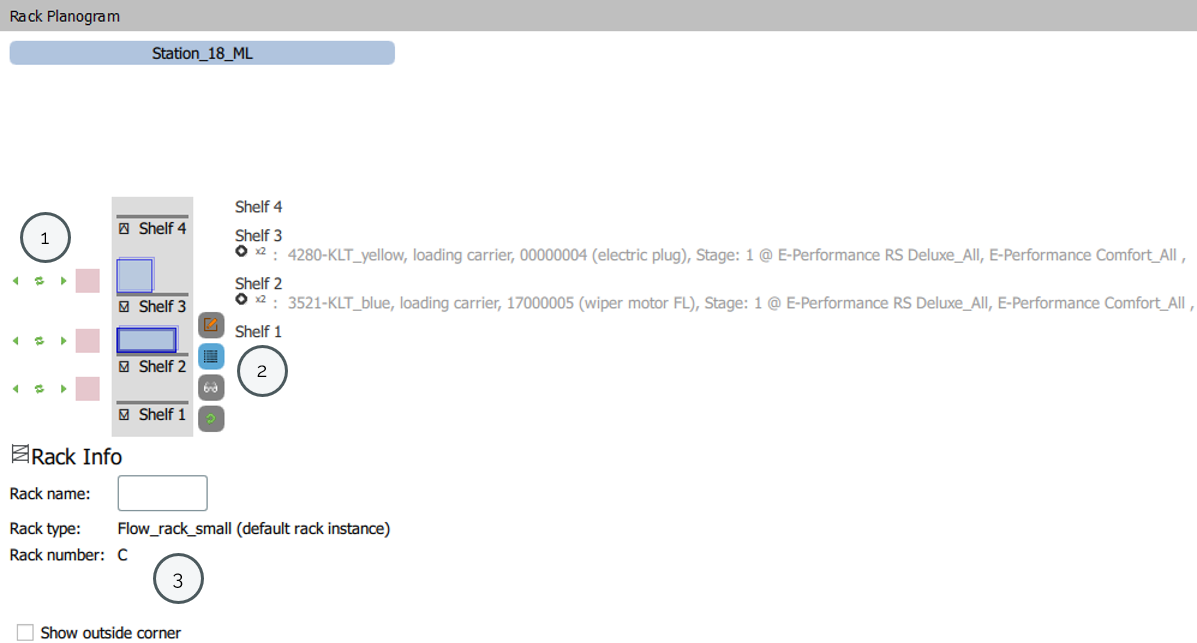
You can also add multiple areas or racks by holding down CTRL and clicking on the according areas or racks.
The material in the rack, or the rack itself, can be edited in the Rack Planogram:
[1] includes all editing options that relate to the material on the shelves. “Push box groups together” can be used to push the material on a shelf to the right or left as densely as possible, “Relayout this shelf” can be used to redistribute the material on the shelf or “Create Blocking Group” can be used to block a shelf.
[2] includes general options relating to the rack and the containers on the shelf. You can open the Rack Instance Editor via “Open rack instance editor” - more information here. A detailed explanation of how to operate the Rack Instance Editor can be found here: Create and publish racks in Rack Editor.
“Show Material List” displays details of the material on the rack, ‘View Rack in 3D’ calls up the rack in the 3D view and ‘Rotate all selected boxes in this rack by 90°’ rotates all selected containers on the rack by 90°.
Information about the rack itself is summarized under [3] - you can also define your own name for the rack here. You will also find the option to display the Outside Corner associated with the material area here.
Moving boxes in and inbetween racks/areas
Boxes can be moved within a shelf, to another rack or even across different areas using drag & drop. To do this, hold down the left mouse button and drag the selected container to the desired location. The boxes can also be moved to the floor. The color of the box corresponds to the color selected in the Material Provisioning Editor.
Please note: If a box is supposed to be moved from one rack to another rack that is located on a different material area, the corresponding racks or material areas must first be selected with CTRL + left-click in the 3D view or the layout.
Navigation
as of Version 4.4.7:
- Left mouse button: Select an element with a single click. You can also cancel multi-select the same way. Hold down CTRL and click on several elements to select them in the 3D view. Hold down CTRL and click on an already selected element to deselect it again in the 3D view.
- Right mouse button: Holding down the right mouse button allows you to move the image section.
- Scroll wheel: Scrolling with the scroll wheel zooms the view in the direction of the mouse pointer or away from it.
Comments
0 comments
Please sign in to leave a comment.