Boxes can be imported as well as newly created. The import is explained here.
Box Editor
New boxes can be created in the editor within a Planning State by clicking the corresponding button "Create New Box":
The data and information stored in the mask will be used later in the planning in the clients. All fields, apart from the dimensions of the box (width, depth, height), must be entered manually. The dimensions, on the other hand, can be derived from the imported graphic.
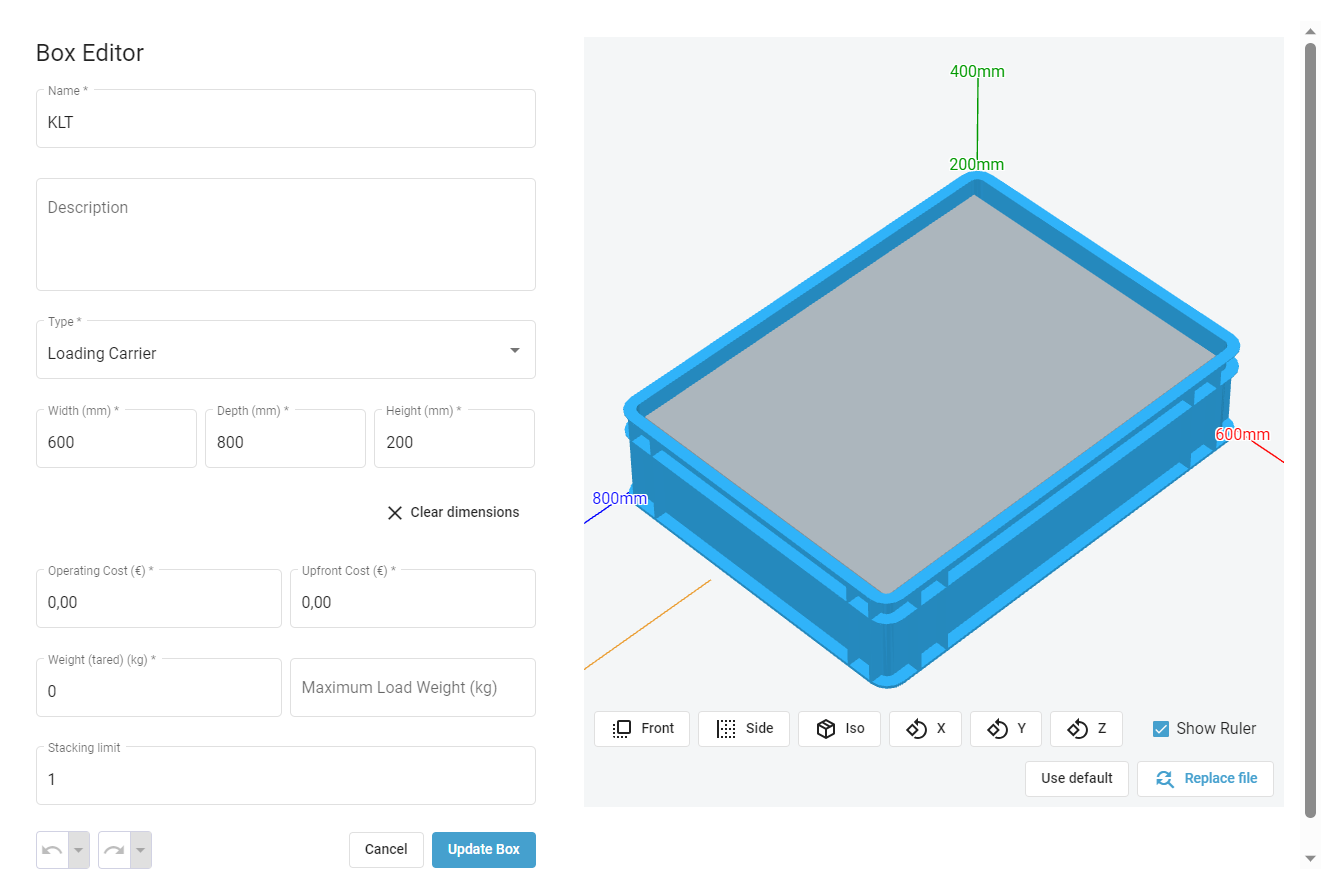
Here in the picture the representation of the dimensions. The width is seen as the side of the container which is at the edge. (highlighted in blue)
3D Graphics Editor
Via "Import Graphics" .gltf and .iv-files can be imported and thus used as 3D graphics. After a successful import, the load unit or load carrier is displayed on the right-hand side.
By pressing and holding the left mouse button the view can be adjusted, scrolling with the mouse wheel causes a zoom in/out.
The buttons 'Front View', 'Side View' and 'Perspective View' below the graphic provide the respective view of the box.
The fields for the length, height and width of the box can be read from the imported graphic. This is done with the blue button 'get the dimensions from the 3-d-model' next to the right of the input mask. A click on the buttons 'X', 'Y' and 'Z' rotates the box around the respective axis.
Please note:
- If the dimensions are taken over from the 3D model and edited, the graphic on the right side adjusts.
- If the graphic is rotated around the X-/Y-/Z-axis and the dimensions are obtained via 'get the dimensions from the 3-d-model', the dimensions of the respective axis parameter are always taken over.
- If no 3D graphic is imported, but the field 'Type' is filled in by selecting one of the two options load carrier or load unit, a corresponding default graphic appears on the right side.
Pending changes - Apply and publish changes
To accept imported, newly created boxes or changes to boxes in the Planning States, proceed as follows:
- In the overview of the boxes, select the button "Pending Changes" in the upper right corner.
- A pop-up window appears, which (in the case of the screenshot) shows the properties of the new box. If a box is edited, a version comparison between the old and new state of the properties appears.
- To release the planning state for use in the planning tasks in the clients, 'Update Planning State' must be selected.
- In the overview, the 'Status' column shows which phase a box is in. Unpublished boxes are labelled "Pending", published boxes are given a blue tick and the status "published".
- The use of boxes in a scenario is explained in this article.
Comments
0 comments
Please sign in to leave a comment.